Installation

IPTV Installation Guide

How to Setup Beku IPTV on All Devices

Step 1 : Find IPTV Server Details in your Email (Check Spam box too)

Before getting started, ensure you have purchased your IPTV subscription from BEKU TV. Once your order is confirmed, we will send your IPTV server details directly to your email. Please remember to check your spam or junk folder if you don’t see the message in your inbox.

Step 2 : Select your Device & Follow The Steps to install an IPTV player and watch your TV Stream

Select your device—Smart TV, Amazon Fire Stick, PC, or mobile—and follow the platform-specific installation steps to set up the IPTV player. Once installed, start streaming your favorite channels and enjoy.

All in one IPTV Smarters app
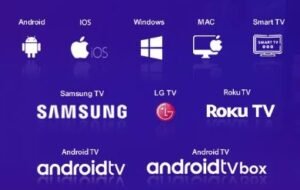
All device

Android,

Android Phones, Android TV, Android TV Boxes, Android FireTV Sticks, Nvidia Shields, and other Android sticks or devices.

Windows/macOS,

Windows 8/10 and all versions of macOS, including the latest versions

iOS Devices,

IPTV Smarters Pro is also available on the Apple Store and supports iPhone, iPad and Apple TV (tvOS).

Smart TVs

Smart TVs like LG & Samsung (App available in the store to download).

Download links:
 

How to Setup IPTV Smarters via Xtream Codes API

STEP 1:

Open the app once downloaded and click on “Add New Playlist” then click on “Player API

STEP 2:

Enter Your Login Details ( We Provided).
AnyName : (Example Beku)
username: 
Password:
URL/DNS: 
Then Click “Add Playlist”
Setup Done. Enjoy Live tv, Movies, Series
To set up the GSE Smart IPTV app on your device in 2026, follow these primary methods. Ensure you have your IPTV service’s M3U URL or Xtream Codes login details ready, as the app does not provide content itself.

1. Installation

  • Android Devices: Download “GSE IPTV Player” from the Google Play Store.
  • Apple Devices (iPhone/iPad/Apple TV): Download “GSE Smart IPTV Player” from the Apple App Store. It requires iOS 16.0 or later as of early 2026.
  • Amazon Firestick: Use the Downloader app to sideload the APK if it is not available in the Amazon Appstore.
 

2. Configuration Methods

Once installed, open the app and use one of the following two setup paths: 
 
Method A: Using M3U URL (Remote Playlist) 
  1. Tap the menu icon (three horizontal lines) in the top-left corner.
  2. Select Remote Playlists.
  3. Tap the “+” icon in the top-right corner and choose Add M3U URL.
  4. Enter a name for the playlist (e.g., “My IPTV”) and paste the M3U URL provided by your service.
  5. Click Add to load your channels.
Method B: Using Xtream Codes API (Recommended for Stability)
  1. Open the menu and select Xtream Codes API.
  2. Tap the “+” icon in the top-right corner.
  3. Enter the following details provided by your provider:
    • Playlist Name
    • Server URL (e.g., http://example.com:8080)
    • Username
    • Password.
  4. Tap Login or Add to sync your Live TV, VOD, and Series categories. 
 

3. Adding the EPG (Program Guide)

If your program guide does not load automatically:
  1. Go to the menu and select EPG Program Guide.
  2. Tap the “+” icon and select Add Remote EPG Source.
  3. Enter the EPG URL provided by your IPTV provider and tap Add
To set up your MAG 250, 254, 256, 322w1, or 324w2 set-top box for 2026, follow these standardized steps for network and portal configuration.
 

1. Network Configuration

Ensure your device is connected to the internet before adding service details.
  • Ethernet (Recommended): Simply plug an Ethernet cable from your router into the box’s LAN port.
  • Wi-Fi (for w1/w2 models):
    1. Go to Settings > System Settings > Network.
    2. Select Wireless and choose Auto (DHCP) to scan for networks.
    3. Select your network, enter your Wi-Fi password using the on-screen keyboard, and save. 
 

2. Portal Setup (IPTV Configuration)

This process links your device to your service provider’s servers. 
  1. Enter System Settings: On the main screen, select Settings or System Settings.
  2. Navigate to Portals: Go to Servers > Portals.
  3. Enter Details:
    • Portal 1 Name: Enter any name (e.g., “My IPTV”).
    • Portal 1 URL: Enter the exact URL provided by our provided Portal URL (starting with http://).
  4. Save and Reboot: Press the OK button to save, then return to the main menu and select Reload Portal or restart the device.
 

3. Troubleshooting & Useful Tips

  • MAC Address: Most providers require your device’s MAC address to activate service. You can find this on a sticker on the bottom of the box (it typically starts with 00:1A:79).
  • Factory Reset: If you are locked out or need a fresh start, unplug the power, hold the small button on the back (or front, depending on model), and replug until the screen turns blue.
  • Remote Programming: To program the MAG remote to control your TV’s volume and power, press and hold the SET and TV Power buttons simultaneously until the light remains solid, then point it at your TV remote and press the corresponding button. 

Kodi setup in 2026 varies by operating system, but generally involves installing the application from a store or official site and then configuring media sources or add-ons

1. Device Installation

 
Device Type Installation MethodOfficial Source
WindowsDownload the installer (.exe) or use the Microsoft Store.Kodi for Windows
Android / Google TVInstall directly from the Google Play Store or sideload the APK.Kodi for Android
Firestick / Fire TVInstall the “Downloader” app from the Amazon Appstore, then enter code 250931 (or official URL) to download the APK.Troypoint Guide
macOSDownload the disk image (.dmg) and drag Kodi to the Applications folder.Kodi for macOS
iOS / tvOSTypically requires a jailbroken device or sideloading via Cydia Impactor.Kodi for iOS
XboxSearch for “Kodi” in the integrated Microsoft Store.Microsoft Store

2. Initial Configuration

Once installed, follow these steps to set up your media:
  • Permissions: On Android TV 11+, you must manually allow “Files and Media” access in Settings > Apps > Kodi > Permissions to see local files.
  • Adding Content: Navigate to Files > Add videos… to link your local hard drives or network storage (SMB/NFS).
  • Enabling Add-ons: To install third-party plugins, go to Settings > System > Add-ons and toggle Unknown sources to “On”.
 

3. Advanced Setup (Optional)

  • Kodi Builds: In 2026, popular builds like “Diggz Xenon” provide pre-configured skins and add-ons. Use these with caution as they can be bloated.
  • Premium Services: Integrate services like Real-Debrid for high-quality, buffer-free links or Trakt.tv to sync your watch history across devices.
  • Security: Using a VPN is highly recommended to protect your privacy when using third-party add-ons. 

4. Using an M3U URL

The M3U URL is a direct link to your channel playlist.
  • Install Add-on: Go to Settings > Add-ons > Install from repository > PVR clients and select PVR IPTV Simple Client.
  • Configure: Navigate to My add-ons > PVR Clients > PVR IPTV Simple Client > Configure.
  • Add URL: Under the General tab, set Location to “Remote Path” and enter your M3U playlist URL.
  • Save & Restart: Click OK and restart Kodi. Your channels will populate under the TV menu.
 

5. Adding an EPG (Electronic Program Guide)

An EPG URL (usually ending in .xml or .gz) provides the schedule data for your channels. 
  • Settings: In the same PVR IPTV Simple Client configuration menu, go to the EPG Settings tab.
  • Add URL: Set Location to “Remote Path” and enter your XMLTV URL.
  • Refresh: Kodi will fetch the data, allowing you to see current and upcoming programs in the “Guide” section. 
 

6. Using Xtream Codes

Xtream Codes consist of a Server URLUsername, and Password.
  • Conversion for Kodi: Most Kodi users convert Xtream Codes into an M3U URL using this format:
    http://SERVER_URL:PORT/get.php?username=YOUR_USER&password=YOUR_PW&type=m3u_plus&output=ts.
  • Native Add-ons: Alternatively, you can use third-party add-ons like Kodi Xtream VOD or Jet TV Guide, which allow direct entry of Xtream credentials for Live TV and Video-on-Demand (VOD). 
Scroll to Top